
Final Up to date on November 23, 2022
Structuring the info pipeline in a manner that it may be effortlessly linked to your deep studying mannequin is a crucial facet of any deep learning-based system. PyTorch packs all the things to just do that.
Whereas within the earlier tutorial, we used easy datasets, we’ll have to work with bigger datasets in actual world situations to be able to totally exploit the potential of deep studying and neural networks.
On this tutorial, you’ll learn to construct customized datasets in PyTorch. Whereas the main target right here stays solely on the picture information, ideas realized on this session will be utilized to any type of dataset similar to textual content or tabular datasets. So, right here you’ll be taught:
- Methods to work with pre-loaded picture datasets in PyTorch.
- Methods to apply torchvision transforms on preloaded datasets.
- Methods to construct customized picture dataset class in PyTorch and apply varied transforms on it.
Let’s get began.

Loading and Offering Datasets in PyTorch
Image by Uriel SC. Some rights reserved.
This tutorial is in three elements; they’re
- Preloaded Datasets in PyTorch
- Making use of Torchvision Transforms on Picture Datasets
- Constructing Customized Picture Datasets
Quite a lot of preloaded datasets similar to CIFAR-10, MNIST, Style-MNIST, and so on. can be found within the PyTorch area library. You may import them from torchvision and carry out your experiments. Moreover, you possibly can benchmark your mannequin utilizing these datasets.
We’ll transfer on by importing Style-MNIST dataset from torchvision. The Style-MNIST dataset contains 70,000 grayscale pictures in 28×28 pixels, divided into ten courses, and every class accommodates 7,000 pictures. There are 60,000 pictures for coaching and 10,000 for testing.
Let’s begin by importing a number of libraries we’ll use on this tutorial.
|
import torch from torch.utils.information import Dataset from torchvision import datasets import torchvision.transforms as transforms import numpy as np import matplotlib.pyplot as plt torch.manual_seed(42) |
Let’s additionally outline a helper operate to show the pattern parts within the dataset utilizing matplotlib.
|
def imshow(sample_element, form = (28, 28)): plt.imshow(sample_element[0].numpy().reshape(form), cmap=“grey’) plt.title(‘Label=” + str(sample_element[1])) plt.present() |
Now, we’ll load the Style-MNIST dataset, utilizing the operate FashionMNIST() from torchvision.datasets. This operate takes some arguments:
root: specifies the trail the place we’re going to retailer our information.practice: signifies whether or not it’s practice or take a look at information. We’ll set it to False as we don’t but want it for coaching.obtain: set toTrue, that means it’ll obtain the info from the web.rework: permits us to make use of any of the accessible transforms that we have to apply on our dataset.
|
dataset = datasets.FashionMNIST( root=‘./information’, practice=False, obtain=True, rework=transforms.ToTensor() ) |
Let’s test the category names together with their corresponding labels we have now within the Style-MNIST dataset.
|
courses = dataset.courses print(courses) |
It prints
|
[‘T-shirt/top’, ‘Trouser’, ‘Pullover’, ‘Dress’, ‘Coat’, ‘Sandal’, ‘Shirt’, ‘Sneaker’, ‘Bag’, ‘Ankle boot’] |
Equally, for sophistication labels:
|
print(dataset.class_to_idx) |
It prints
|
{‘T-shirt/high’: 0, ‘Trouser’: 1, ‘Pullover’: 2, ‘Gown’: 3, ‘Coat’: 4, ‘Sandal’: 5, ‘Shirt’: 6, ‘Sneaker’: 7, ‘Bag’: 8, ‘Ankle boot’: 9} |
Right here is how we are able to visualize the primary ingredient of the dataset with its corresponding label utilizing the helper operate outlined above.
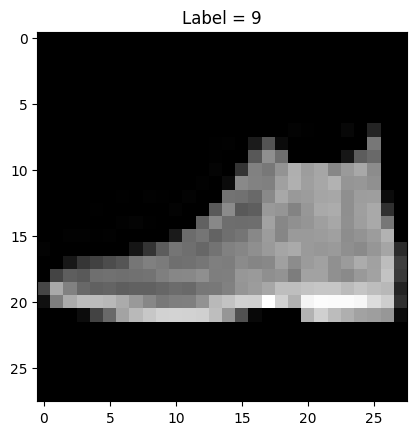
First ingredient of the Style MNIST dataset
In lots of instances, we’ll have to use a number of transforms earlier than feeding the photographs to neural networks. For example, a variety of instances we’ll have to RandomCrop the photographs for information augmentation.
As you possibly can see under, PyTorch permits us to select from quite a lot of transforms.
This exhibits all accessible rework capabilities:
|
[‘AugMix’, ‘AutoAugment’, ‘AutoAugmentPolicy’, ‘CenterCrop’, ‘ColorJitter’, ‘Compose’, ‘ConvertImageDtype’, ‘ElasticTransform’, ‘FiveCrop’, ‘GaussianBlur’, ‘Grayscale’, ‘InterpolationMode’, ‘Lambda’, ‘LinearTransformation’, ‘Normalize’, ‘PILToTensor’, ‘Pad’, ‘RandAugment’, ‘RandomAdjustSharpness’, ‘RandomAffine’, ‘RandomApply’, ‘RandomAutocontrast’, ‘RandomChoice’, ‘RandomCrop’, ‘RandomEqualize’, ‘RandomErasing’, ‘RandomGrayscale’, ‘RandomHorizontalFlip’, ‘RandomInvert’, ‘RandomOrder’, ‘RandomPerspective’, ‘RandomPosterize’, ‘RandomResizedCrop’, ‘RandomRotation’, ‘RandomSolarize’, ‘RandomVerticalFlip’, ‘Resize’, ‘TenCrop’, ‘ToPILImage’, ‘ToTensor’, ‘TrivialAugmentWide’, ...] |
For example, let’s apply the RandomCrop rework to the Style-MNIST pictures and convert them to a tensor. We will use rework.Compose to mix a number of transforms as we realized from the earlier tutorial.
|
randomcrop_totensor_transform = transforms.Compose([transforms.CenterCrop(16), transforms.ToTensor()]) dataset = datasets.FashionMNIST(root=‘./information’, practice=False, obtain=True, rework=randomcrop_totensor_transform) print(“form of the primary information pattern: “, dataset[0][0].form) |
This prints
|
form of the primary information pattern: torch.Measurement([1, 16, 16]) |
As you possibly can see picture has now been cropped to $16times 16$ pixels. Now, let’s plot the primary ingredient of the dataset to see how they’ve been randomly cropped.
|
imshow(dataset[0], form=(16, 16)) |
This exhibits the next picture
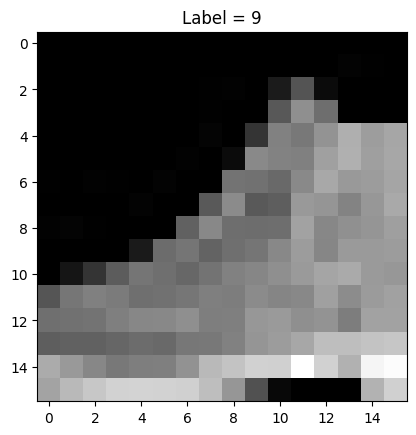
Cropped picture from Style MNIST dataset
Placing all the things collectively, the whole code is as follows:
|
1 2 3 4 5 6 7 8 9 10 11 12 13 14 15 16 17 18 19 20 21 22 23 24 25 26 27 28 29 30 31 32 33 34 35 36 37 |
import torch from torch.utils.information import Dataset from torchvision import datasets import torchvision.transforms as transforms import numpy as np import matplotlib.pyplot as plt torch.manual_seed(42)
def imshow(sample_element, form = (28, 28)): plt.imshow(sample_element[0].numpy().reshape(form), cmap=‘grey’) plt.title(‘Label=” + str(sample_element[1])) plt.present()
dataset = datasets.FashionMNIST( root=“./information’, practice=False, obtain=True, rework=transforms.ToTensor() )
courses = dataset.courses print(courses) print(dataset.class_to_idx)
imshow(dataset[0])
randomcrop_totensor_transform = transforms.Compose([transforms.CenterCrop(16), transforms.ToTensor()]) dataset = datasets.FashionMNIST( root=‘./information’, practice=False, obtain=True, rework=randomcrop_totensor_transform) )
print(“form of the primary information pattern: “, dataset[0][0].form) imshow(dataset[0], form=(16, 16)) |
Till now we have now been discussing prebuilt datasets in PyTorch, however what if we have now to construct a customized dataset class for our picture dataset? Whereas within the earlier tutorial we solely had a easy overview concerning the parts of the Dataset class, right here we’ll construct a customized picture dataset class from scratch.
Firstly, within the constructor we outline the parameters of the category. The __init__ operate within the class instantiates the Dataset object. The listing the place pictures and annotations are saved is initialized together with the transforms if we need to apply them on our dataset later. Right here we assume we have now some pictures in a listing construction like the next:
|
attface/ |– imagedata.csv |– s1/ | |– 1.png | |– 2.png | |– 3.png | … |– s2/ | |– 1.png | |– 2.png | |– 3.png | … … |
and the annotation is a CSV file like the next, situated underneath the basis listing of the photographs (i.e., “attface” above):
|
s1/1.png,1 s1/2.png,1 s1/3.png,1 … s12/1.png,12 s12/2.png,12 s12/3.png,12 |
the place the primary column of the CSV information is the trail to the picture and the second column is the label.
Equally, we outline the __len__ operate within the class that returns the full variety of samples in our picture dataset whereas the __getitem__ methodology reads and returns an information ingredient from the dataset at a given index.
|
1 2 3 4 5 6 7 8 9 10 11 12 13 14 15 16 17 18 19 20 21 22 23 24 25 26 27 28 29 30 31 32 33 34 35 36 37 38 39 |
import os import pandas as pd import numpy as np from torchvision.io import learn_picture
# creating object for our picture dataset class CustomDatasetForImages(Dataset): # defining constructor def __init__(self, annotations, listing, rework=None): # listing containing the photographs self.listing = listing annotations_file_dir = os.path.be a part of(self.listing, annotations) # loading the csv with data about pictures self.labels = pd.read_csv(annotations_file_dir) # rework to be utilized on pictures self.rework = rework
# Variety of pictures in dataset self.len = self.labels.form[0]
# getting the size def __len__(self): return len(self.labels)
# getting the info gadgets def __getitem__(self, idx): # defining the picture path image_path = os.path.be a part of(self.listing, self.labels.iloc[idx, 0]) # studying the photographs picture = read_image(image_path) # corresponding class labels of the photographs label = self.labels.iloc[idx, 1]
# apply the rework if not set to None if self.rework: picture = self.rework(picture)
# returning the picture and label return picture, label |
Now, we are able to create our dataset object and apply the transforms on it. We assume the picture information are situated underneath the listing named “attface” and the annotation CSV file is at “attface/imagedata.csv”. Then the dataset is created as follows:
|
listing = “attface” annotations = “imagedata.csv” custom_dataset = CustomDatasetForImages(annotations=annotations, listing=listing) |
Optionally, you possibly can add the rework operate to the dataset as properly:
|
randomcrop_totensor_transform = transforms.RandomCrop(16) dataset = CustomDatasetForImages(annotations=annotations, listing=listing, rework=randomcrop_totensor_transform) |
You should use this tradition picture dataset class to any of your datasets saved in your listing and apply the transforms to your necessities.
On this tutorial, you realized tips on how to work with picture datasets and transforms in PyTorch. Notably, you realized:
- Methods to work with pre-loaded picture datasets in PyTorch.
- Methods to apply torchvision transforms on pre-loaded datasets.
- Methods to construct customized picture dataset class in PyTorch and apply varied transforms on it.